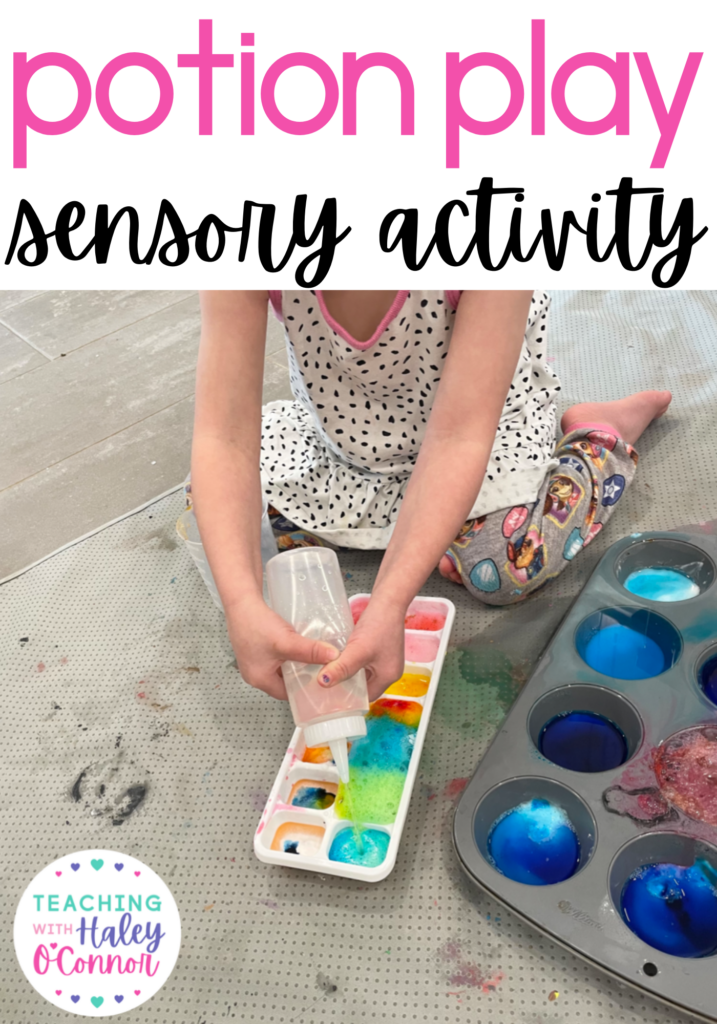
Making Potions (Our Favorite Sensory Activity)
Potion Making is one of our absolute favorite things to do! There are so many variations of this sensory activity, and I love that I can make it as simple or fancy as I want.
I wanted to share our favorite things to have on hand so I can easily pull this activity out when we need a fresh start to our day. I hope that you have a lot of these things already! Some of these I keep set aside for sensory activities, and some we just use what we have in our kitchen. This is a great activity to do outside if the weather is nice, or in your tub or shower! I’ll share how we contain the mess if we decide to do it inside.
This blog post contains affiliate links. That means I receive a small stipend if you use my links, and I use that to keep this website up and running. This is at no cost to you, and everything I share is something I have used and loved.
Ingredients
There are so many things you can use to make potions! All you need are some liquids, some things to add (baking soda, glitter, leaves), and materials for mixing and pouring!
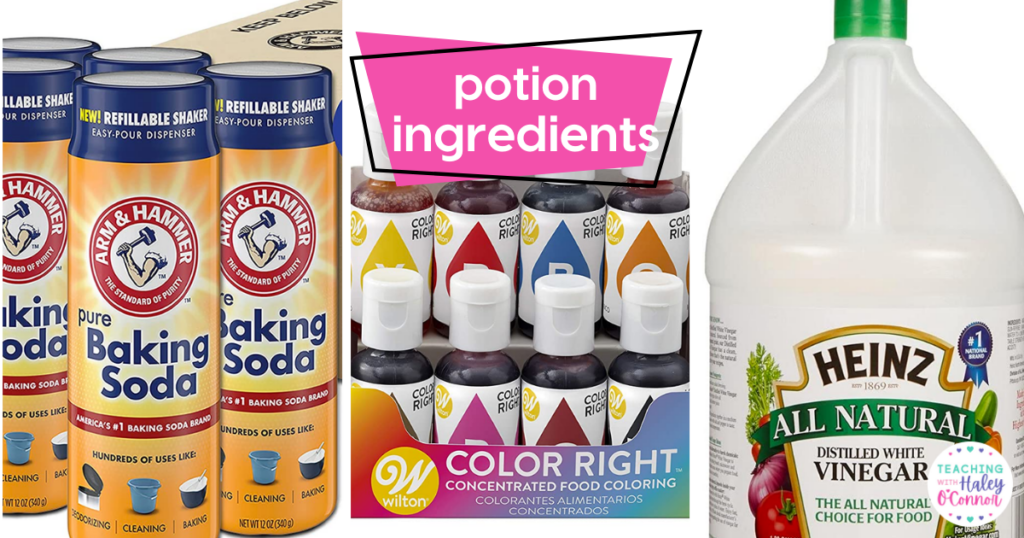
Anytime we use potions, I include:
Water
Other Things To Add
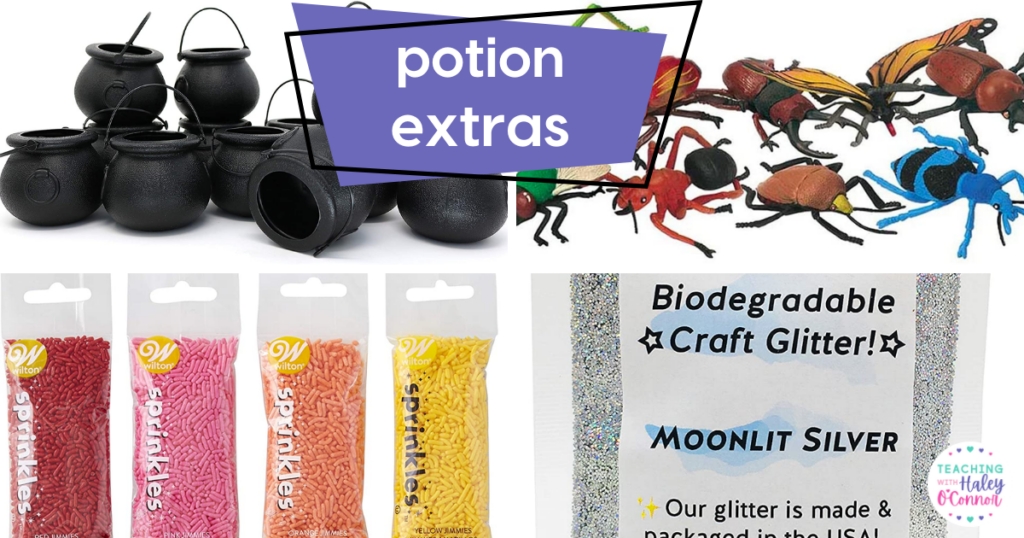
Themed items like cauldrons for Halloween. This set with pumpkins and ghosts was a huge hit.
Themed Items, like cauldrons.
Sprinkles are really fun to add! My daughter loves to watch them lose their color as they get wet.
Biodegradable Glitter (this is especially important if you’re doing it outside.)
Nature treasures, like leaves, rocks, grass, and flowers. You can go on a “hunt” around your neighborhood with a bucket or grocery bag to collect things you’d like to add to your potions. There’s no right or wrong, and whatever is engaging to your child is going to be the best thing to use!
Frozen treasures (freeze plastic animals, trucks etc.)
Splat Mat or Floor Cover
If you do this outside, you probably don’t need to cover the ground. But our grass isn’t super soft, so even if we go outside, I still like to keep something down on the ground. We’ve also stained our concrete quite a few times with paint and food coloring 😛. I use this mat ALL THE TIME. We use it when we paint, do water play, or make potions! It’s waterproof so nothing seeps out…and we have poured a LOT of water on it. It would also be great if you have a messy eater. It’s plastic so we don’t dry it, but we have definitely put it in the washing machine. You could also hose it off and let it dry in the sun!
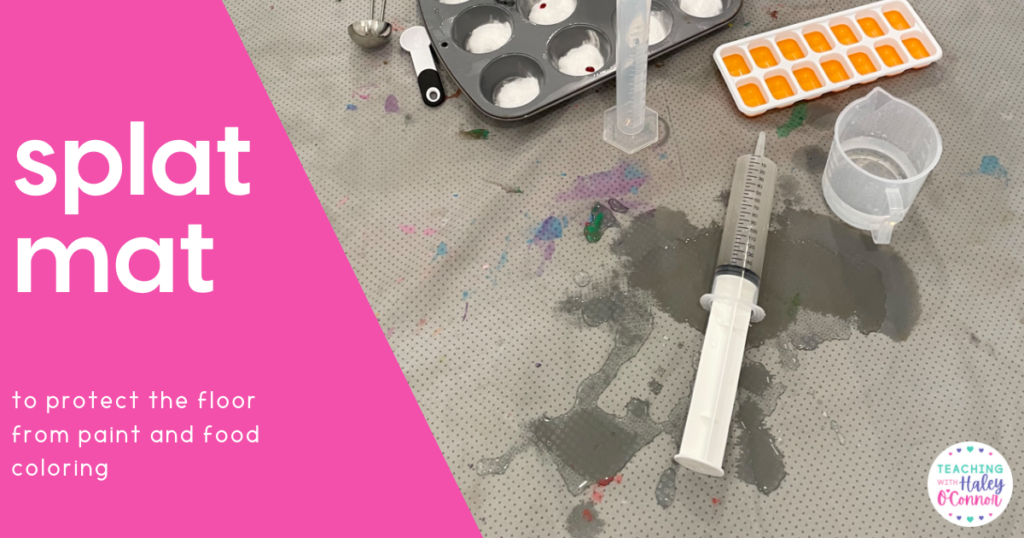
The picture will take you to my favorite one that’s a great price. There are a lot of options on Amazon, just make sure it’s big enough. We move around quite a bit when we make potions, and you just want to make sure there’s enough space for your students or kids to use both sides of the materials, etc. You can also use a canvas drop cloth, and this is something I’m planning to do this year. After you’ve used it a few times, especially with paint, it starts to feel very cool and abstract! Another option would be to use a large trash bag and use painters tape to attach it the ground.
Muffin Tins
We use our muffin tins for EVERYTHING, including potions. I often use them for paint pallets, and for other types of sensory play. For baking, I definitely prefer silicone. However, because they’re so “floppy” they can be super frustrating for sensory play. My daughter loves to pour and transfer, and silicone is just not easy to move around. I definitely recommend metal muffin tins for sensory play and potions!
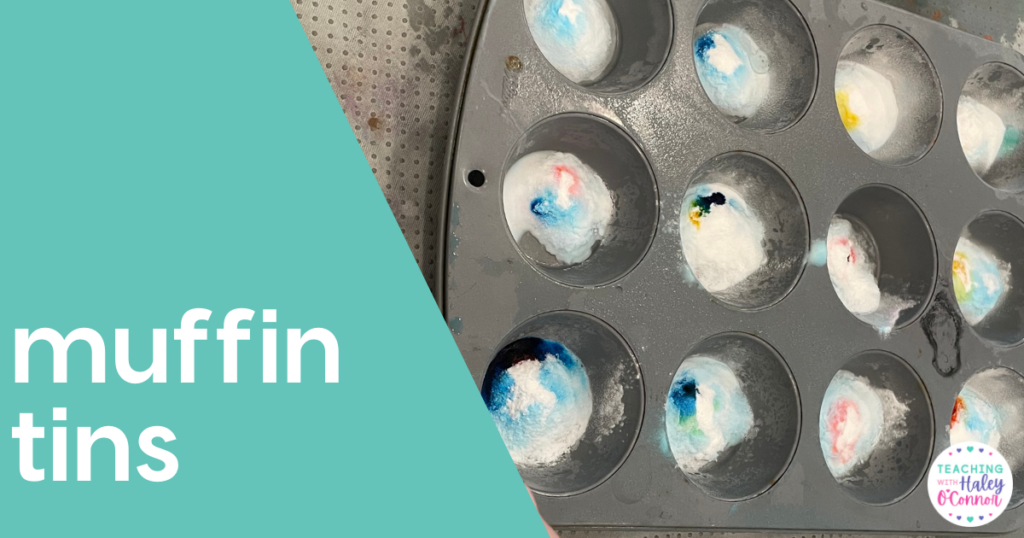
We really like the Wilton brand, and I actually prefer the 6 count to the 12 count for sensory play. It just feels less daunting and overwhelming! Sometimes these will show up at the Dollar Tree, and they are definitely worth grabbing! You can also check out local thrift stores and local Buy Nothing Groups. This 3 pack is a pretty good deal, and would likely last a while.
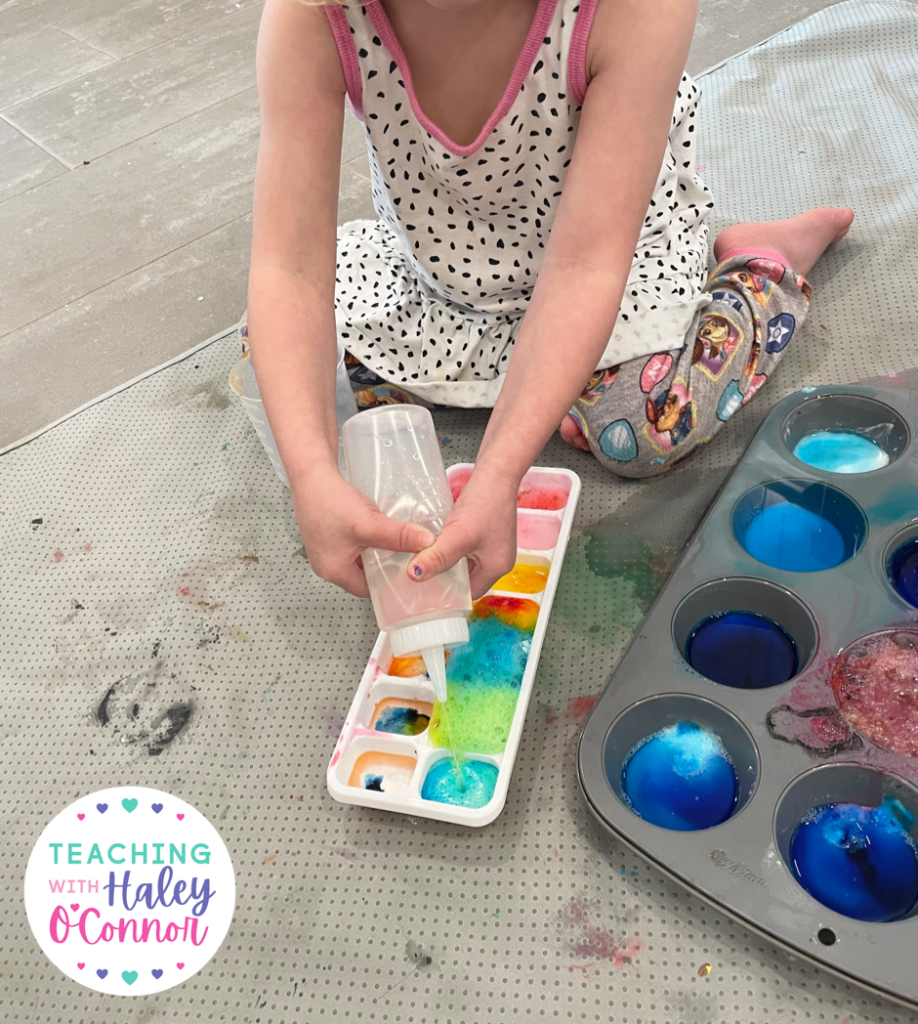
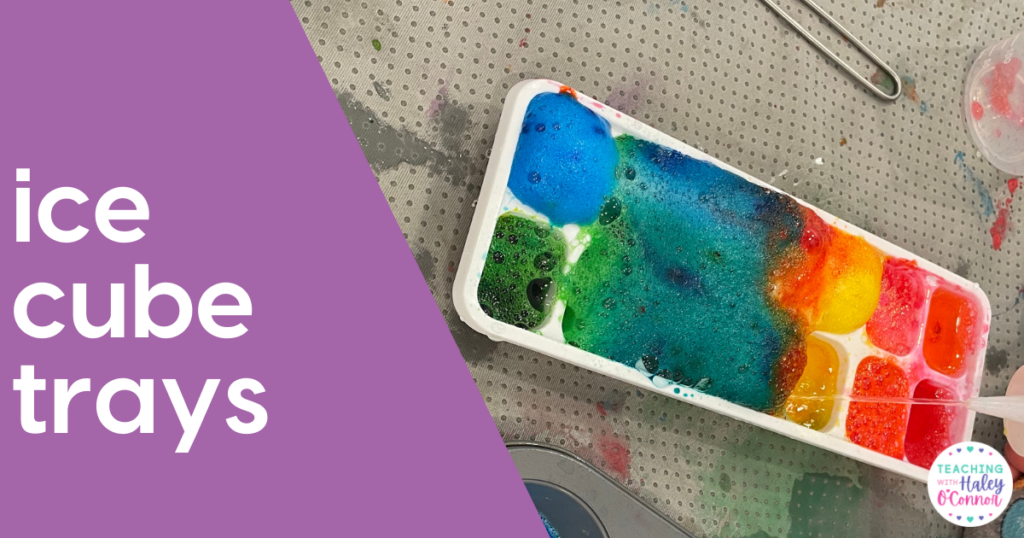
Ice Cube Tray
Ice cube trays are basically the same thing as muffin trays…they provide a small space for different mixtures and potions. I like the ice trays, because I can use less ingredients, but she can have just as many “explosions” or potions. We have an ice maker, so this is something I had to buy seperate for sensory play. However, we’ve had ours for years and we use them almost daily. I use them for paint, potions, rice, etc. Again, I recommend a hard plastic over silicone, if you think your child or students will like to do lots of pouring and transferring.
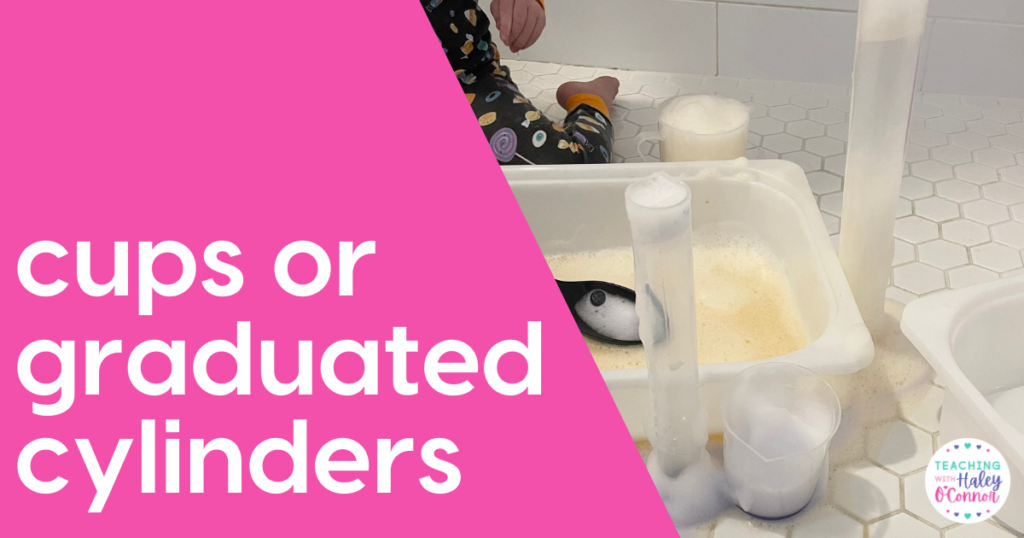
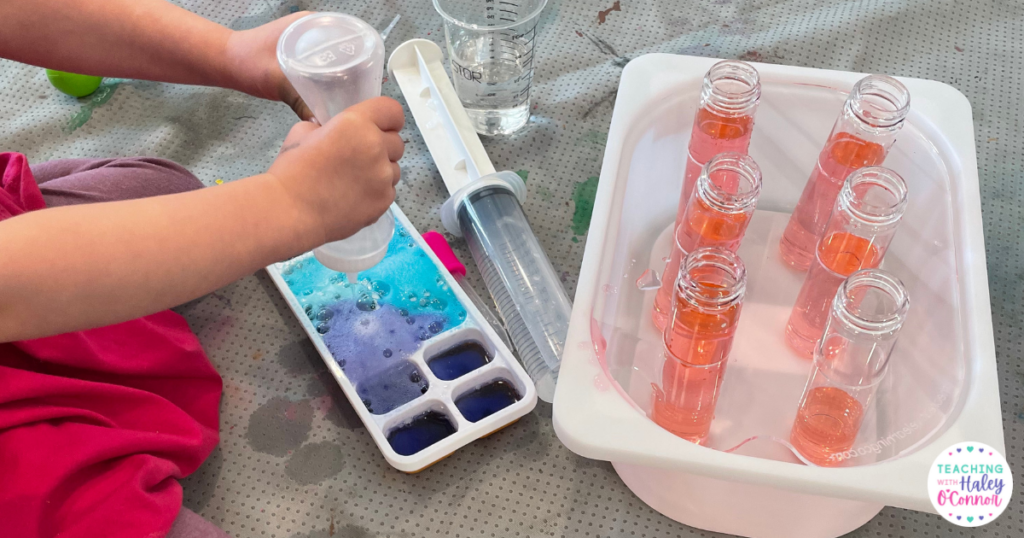
Graduated Cylinders or Cups
We get SO much use out of this plastic graduated cylinder set. The handles make them easy to pour from, and the various heights make our potion play more engaging, I think! We use these often with just basic water play…she doesn’t need a lot to be engaged! I love that these can grow with us as we start doing more math and science. These would be an excellent purchase for any classroom as well.
You can absolutely use cups or bowls that you already have! I often save cups when we have parties to use for sensory play as well.
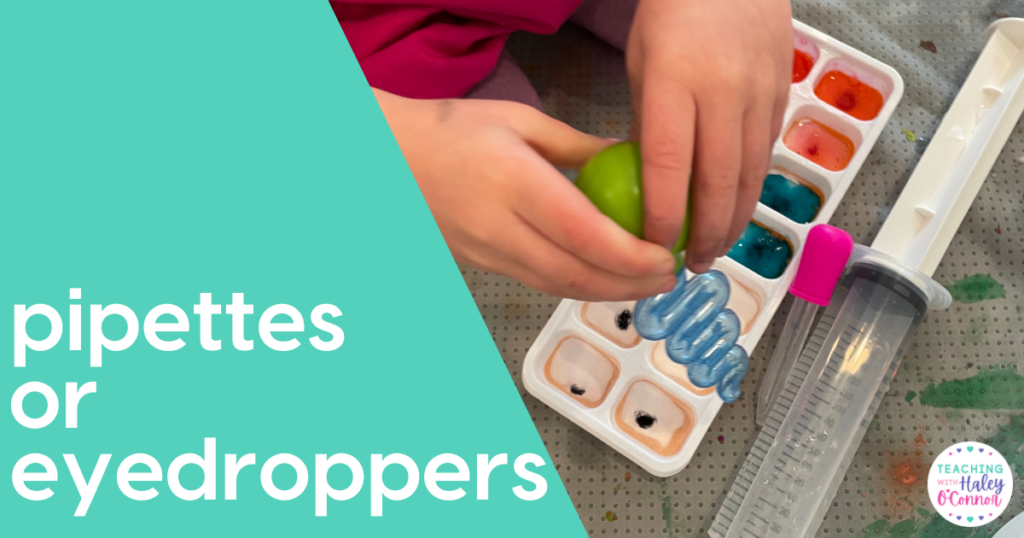
Pipettes or Eyedroppers
I love using eyedropper and pipettes in sensory play, and especially in potions. We have several sets, and I think we use them equally. The Learning Resources Eyedroppers are a great size for little hands, an so is the Fine Motor set. They are sturdy, and my daughter is easily able to squeeze them get liquids in them. They tops do not come off, though, so they aren’t super easy to clean if you need to. We also like these simple pipettes…they are so great for fine motor and even patience. They also make our play last longer, because less liquid comes out each time. They come in a huge pack (150), which is way more than we would ever use or need. We donated about 100 to her school, and shared the rest with our neighbors. I kept about 15 for us because they get lost/thrown away easily. We also use these large plastic syringes. They are so great for hand strength, because you really have to “press” to get the liquid out.
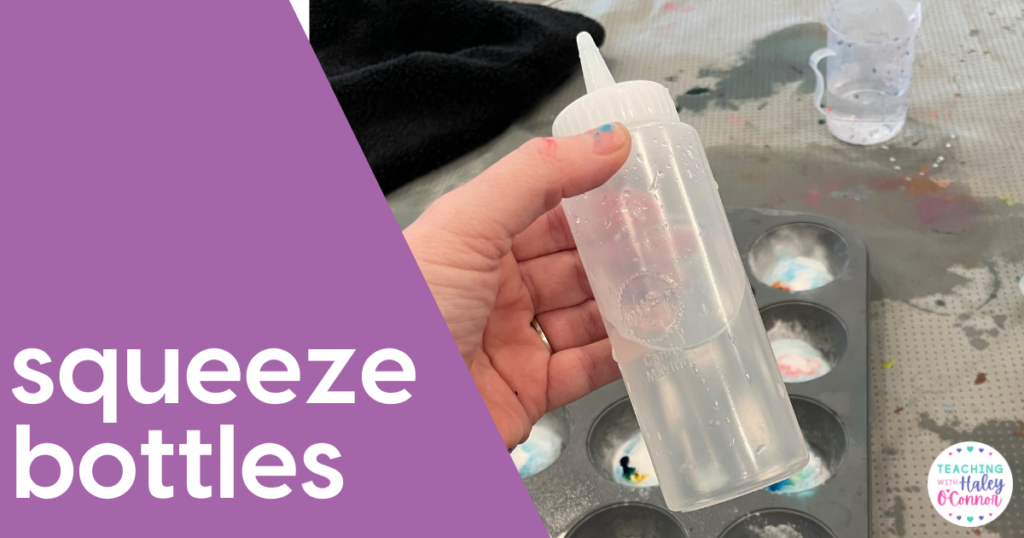
Squeeze Bottles
Finally, we love using these squeeze bottles. We use them for baking, decorating cookies, painting, watercolors, and sensory play. They are perfect for vinegar when we make potions, and they are a great size for her to manage. They come with a little red cap that would absolutely be a choking hazard, so I just tossed them.
Set Up
There’s no right or wrong way to set up a little Potion Party! I typically put 1-2 drops of food coloring in a muffin tin or ice tray. Then I had a little bit of baking soda on top in each section.
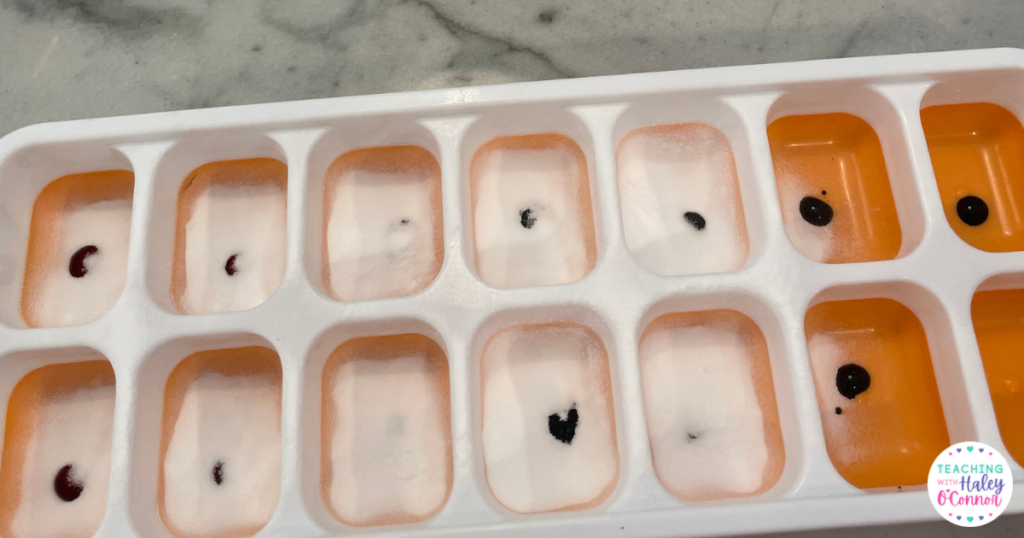
I don’t know the exact ratio of baking soda to vinegar, and it’s never been an issue for us! I usually dilute the vinegar with water just so the activity lasts longer. I put vinegar in some squeeze bottles or a small cup with pipettes. I haven’t trusted her with food coloring yet, but I do often give her some in cups of water so it’s diluted enough for when she pours it out.
Extensions and Grown Up Prompts
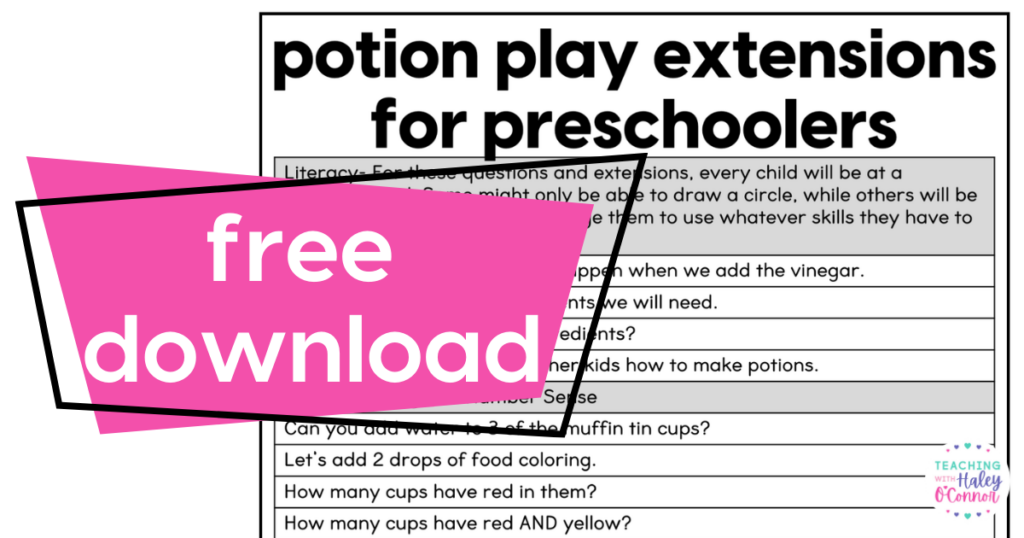
There are SO many benefits to sensory play! From helping kids regulate their emotions, to helping support sensory sensitivities, I could talk about it all day! But there are a few things Potion Play is really beneficial for! Here are a few learning extensions and prompts you could use with your child or students. If you’d like to extend the learning, I created this list of prompts and extensions you can use with your child or students.
Just type in you email, and it will go right to your inbox!